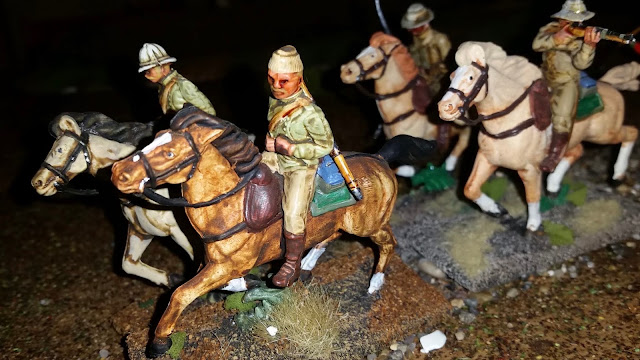
I have begun to paint my new collection of the Jacobite Rebellion of
1745/46 plastic figures. Most of the Highlanders are Replicants, but I
found six of the Cherilea Jacobites at http://toysoldierhq.com/
(a great resource). The Highlanders are definitely Old School, but they
have a certain charm. I made up the plaid, I think it's the MacStern
clan. The English grenadier is a Charbens recast. Again, very Old
School. I had to add a fair amount of painted on detail. Until LOD
Enterprises re-releases the Barzso British infantry from the Last of the
Mohicans range, I will use my AWI British for the line company figures.
Considering I have 50 Highlander kilts to paint, it may take a while
before I get this collection onto the game table.
How would you treat mixed line and grenadier units? I am planning to use About Bonaparte for the 1745 Jacobite Rebellion. In that conflict, the British did not field converged battalions of grenadiers (and no light infantry yet), but instead divided the usually full strength, or over strength, grenadier company and placed half on each of the flanks. I am thinking about using a 12 figure unit with 8 line infantry and four grenadiers, two on each flank. But it could be real headache, giving them different abilities and keeping track of who becomes a casualty. I guess it depends whether you look at the units as companies or full battalions. Is it worth it or should I just field separate grenadier units, even though it's unhistorical? Do you recall how you dealt with this question in your club's 2012 Culloden game?
Thursday, 6 February 2020
Saturday, 1 February 2020
As at Bronkhorstspruit; Dec. 20th 1880
First Anglo-Boer War: Surprise attack with a deck of cards
In the late 1880, The Boer territory of Transvaal declared itself an autonomous republic, no longer submissive to Great Britain. Larger settlements in the Transvaal, who held garrisons of some size, were immediately surrounded by well organized Boers commando’s (fighting groups). In order to relieve the city of Pretoria, Lieutenant-Colonel Anstruther and his element of the 94th regiment was ordered to march up there. This column did not travel unnoticed.
 |
| From: ‘Last stand at Majuba Hill’, a Simon Fonthill Novel by John WIlcox; page 110 |
Gameplay and figures
So far the condensed background story of this tabletop battle in 54mm figures. One of the features I miss in most rule sets, is the effect of an ambush. I played this one solo, using the About Bonaparte rules by Mr. Dirk Donvil as the core mechanism. Amongst other colonial, Boer War specific boost-up’s, I introduced a randomized initiative system. Much like The Sword and the Flame uses playing cards, I’ve done more or less the same. Decided how many turns this game should last (a card per turn) and took half that amount in red (British) and half black (Boers) cards, mixed these blind and put facing down.I mainly used the figures I have collected for these conflicts, so far. But Anstruthers column needed more men and officers. Since I only have a small contingent of colonial Brits in scarlet jackets, I had to improvise from the historical point of view. That’s why you’ll see some ‘fresh’ units on the table. They are metal Britains. British officers are also a mixed bag. My priority is the ‘game-feel’and I’ll improvise where I need to.
 |
| Anstruthers column of the 94th Reg. on the dirt track to Pretoria. In full extend and unaware, after two consecutive red initiative cards. |
The battle commences...
Picking an initiative card showed the British to have their first turn, thereafter followed by again a British turn. Following the intentions and mindset of the commanding officer Anstruther, the detachment of the 94th is now in full length on the table making a maximum (road) movement turn. Spirits are high as more than half of the distance to Pretoria has been covered and the rain that troubled the advance initially, has ceased. They are only one playing card away from disaster.... As the next turn is a black spades 9, the Boers aim their primed Mausers from behind the thorny bushes and bulletproof boulders.. open FIRE!
 |
| Hidden are mounted Boers, ready to close in to contribute to the British disorder. |
 |
| Within minutes casualties start to pile up. |
 |
| Some units get a minor chance to organise their opposition.... |
 |
| ... but others are sitting ducks and heavily shot upon, like these mounted infantrymen in the head of the column. |
It only takes a few turns for the Boers to wipe out both the advanced- and rearguard units. This has a devastating effect on morale of the remaining firepower. The unpredictable factor of initiative changing sides (or not!) certainly contributes to the game-excitement for a solo player. In this specific game the British just did not have enough time (read: were totally taken by surprise, operating more or less blind in hostile ground) to effectively defend themselves. I was content with the resulting gameplay. It’s now a question if it would work as well with two opposite players.
Everyone interested in the matter, please feel free to leave a comment!
Subscribe to:
Comments (Atom)

