More or less forced to absence, I was, from this blog.
Happy to let you all know that I've recently regained access to it again.
Sorry you all had to miss out on several of my played games.
Nothing really new, apart from that I have set my Napoleonic ambitions aside.
Colonial adventures keep me occupied game-wise. Followed directly by Ww2 theatres.
Thats paratrooper and special operations actions, from all parties, mainly.
Below, a frozen moment from a now running game. Just for atmosphere.
Nick will know it, as will regular readers of this blog too. There was an earlier posting, covering the same scenario. Nick did that, some years ago. It was published here.
It's situated in the Indian Mutiny of 1857.
From the scenario booklet Colonial Conflicts.
Badli Ki Serai; the roadblock to Dehli.
I play this solo using a hotchpotch of rulesets that together, suit me well.
What we see in the picture is just after turn 5 (of 8).
Mutineers in the centre, sandwiched from both flanks by 2 'Her Majesty's and West Indian Company' brigades. A third brigade hangs in front of the blockade and does little damage.
The serai, (a caravan restingplace, a bit like an inn) on the righthand side, has already been overtaken by the British troops.
Above two pictures show the initial layout of the gametable. (1) British depoyment zone (2) Walled village of Badli Ki, mutineers left flank (3) Mutineers centered, improvised barricades and gun positions (4) The serai, forming the utmost right flank of the mutineers (5) swamp terrain (6) the Great Trunkroad leading to Dehli.
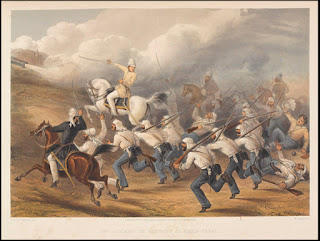
Contemporary print resembling the storming of the sandbagged heavy gun battery on the center-right of the mutineers.
Deployment of Her Majesty's and Honourable West India Company's forces. The marked brigade (Grave's) got separated from the mainforce, got lost and entered the field later during the battle and in another spot. There's an arrival table in the scenario, to regulate this.
In above photo, the third brigade, housing all cavalry elements, enters the field front the mutineers left flank (as per the scenario). Ordered to make this manouvre by the C-in-c, based on recce.


Magnificent! I would love to see more photos, if you have them.
ReplyDeleteNick, I do have some more photos. My apologies for they contain, for a part, explanatory notes. On the other hand they might give some viewers more insight into the scenario dynamics. I will post them beneath the original publication. The final photo will be of my written account of this battle. It's not that clear/sharp that it can be read in full. It's a piece of the fun I have with it, playing a solo game.
ReplyDeleteMarcel, thank you for sharing your photos and game notes. I do not play solo games, but I may be inspired to give it a go.
ReplyDeleteHi Marcel. I never did solo playing, but the table looks very good. I think solo playing takes a lot of preparation to still have the uncertainty of what the oponant will do. Curious about the mechanisms you use.
ReplyDelete